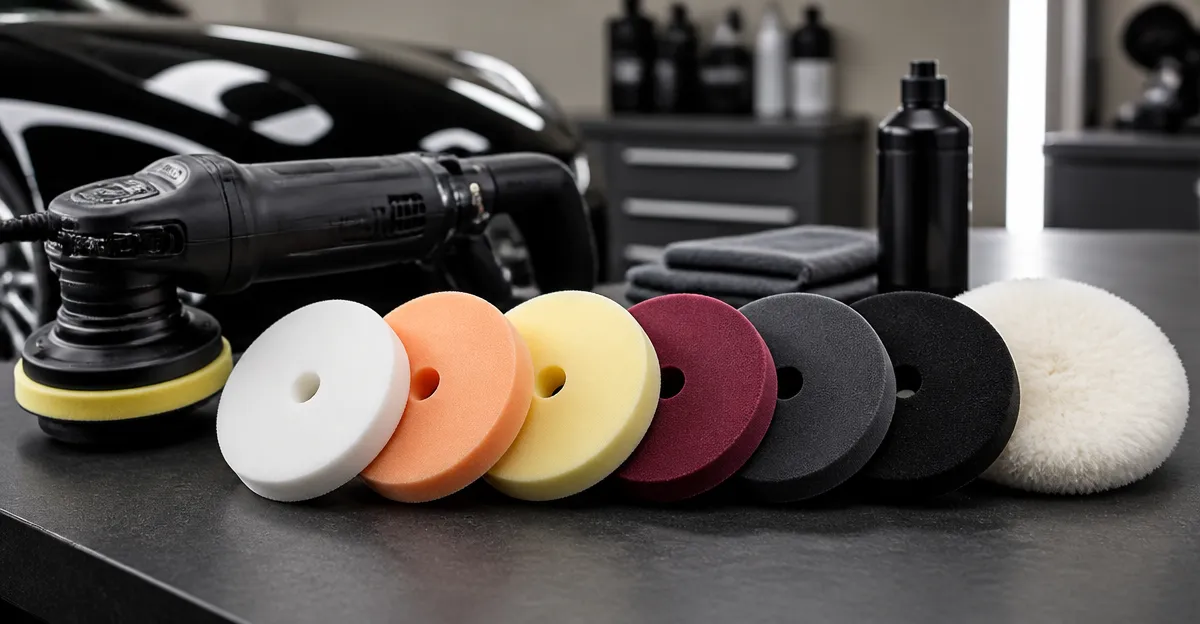
Introduction
When a vehicle owner decides to restore the showroom shine, the choice of polishing pads becomes a decisive factor. Understanding the relationship between pad composition, cut level, and orbital motion empowers one to achieve professional results without excessive expense. This guide explains how to evaluate paint condition, match it with the appropriate pad, and complete the workflow from compound application to final wax. By following the step‑by‑step process, readers will minimize swirl marks, avoid surface damage, and enjoy a durable gloss.
The orbital polisher is a versatile tool that can accommodate a wide range of pad sizes and foam densities. However, the same machine can produce vastly different outcomes depending on the pad that is attached. Selecting the wrong pad may lead to insufficient correction, premature wear of the paint, or unnecessary labor. Therefore, a systematic approach to pad selection is essential for both weekend enthusiasts and seasoned detailers.
In addition to technical guidance, this article recommends several high‑quality products that have proven performance on the market. Each recommendation is grounded in real‑world customer sentiment, price‑to‑value ratio, and specific features that align with the step being described. The reader may choose to purchase the suggested items or substitute comparable alternatives without compromising the instructional value.
By the end of the guide, one will be able to diagnose paint defects, choose the correct cutting, polishing, or finishing pad, and apply protective wax with confidence.
What You’ll Need
- Orbital polisher with 5‑inch or 6‑inch backing plate
- Compound or polish appropriate for the paint defect level
- Wax or sealant for final protection
- Microfiber towels for wipe‑down
- FONAROLL Microfiber Wax Applicator Pads – for wax application and light polishing
- SPTA 6.5" Buffing Pad Kit – heavy‑cut and multi‑stage foam pads
- Chemical Guys Foam Buffing Pad Kit – cutting, polishing, and finishing pads with cleaner
- Mothers Microfiber Polishing Pads – ultra‑soft microfiber applicators for final polish
- SPTA 5.5" Buffing Pad Kit – versatile 5.5‑inch pads for medium‑cut work
Step 1 – Assess Paint Condition and Choose the Correct Cut Level
The first task is to inspect the vehicle’s surface under bright light and identify the severity of defects. Light swirl marks and oxidation typically require a medium‑cut pad, whereas deep scratches or orange‑peel texture demand a heavy‑cut foam. For this assessment, the SPTA 6.5" Buffing Pad Kit offers a comprehensive color‑coded system: green T120 for heavy‑cut, yellow T80 for high‑cut, blue T60 for moderate‑cut, orange T40 for medium‑cut, and red T10 for ultra‑fine finishing. Each pad is engineered to lock polishing compound and dissipate heat, which reduces the risk of burning the clear coat during aggressive correction.
Choose the pad that matches the defect level: heavy‑cut for 1200‑1500 grit sanding marks, high‑cut for 1500‑2000 grit swirl marks, moderate‑cut for medium oxidation, and medium‑cut for light scratches. The kit’s dual‑size design (front 6.5 in, back 6 in) ensures compatibility with most orbital machines while protecting the paint from edge‑related scratches. Selecting the appropriate pad at this stage prevents unnecessary re‑work and maximizes correction efficiency.
Step 2 – Prepare the Polisher and Attach the Selected Pad
Before mounting any pad, verify that the polisher’s speed is set to the manufacturer’s recommended range for the chosen cut level, typically 2,500–3,500 RPM for foam pads. Clean the backing plate with a lint‑free cloth to remove dust that could imprint onto the pad. Apply a thin layer of the chosen polishing compound onto the pad surface; the compound will spread evenly due to the pad’s open‑cell foam structure.
For the final wax or sealant stage, the FONAROLL Microfiber Wax Applicator Pads provide a premium microfiber‑sponge blend that absorbs product without streaking. Their machine‑washable design allows repeated use, and the sewn edges minimize friction that could otherwise cause micro‑scratches. Using these pads after polishing ensures a uniform wax layer and a mirror‑like finish.
Step 3 – Apply Compound with the Appropriate Foam Pad
Dispense a pea‑sized amount of compound onto the working area of the pad. Spread the compound in a circular motion before engaging the orbital motion; this prevents splatter and ensures consistent coverage. Activate the polisher and work the pad over a 4‑inch section for 10‑15 seconds, then pause to inspect the result. If the defect persists, repeat the pass or switch to a slightly more aggressive pad from the SPTA 6.5" Buffing Pad Kit.
When the paint requires a medium‑cut approach, the SPTA 5.5" Buffing Pad Kit offers a compact alternative that fits 5‑inch plates while delivering the same cut hierarchy. Its green T120 and yellow T80 pads are ideal for quick correction on smaller panels such as hatchbacks or SUVs. Both kits are washable, reusable, and maintain compound lock‑in, which reduces product waste.
Step 4 – Refine the Surface with a Polishing Pad
After the heavy or medium cut, switch to a polishing pad to restore depth and gloss. The Chemical Guys Foam Buffing Pad Kit includes a dedicated polishing pad that features Hex‑Logic geometry for even product distribution and reduced heat buildup. This pad excels at extracting residual haze while preserving the corrected surface.
Apply a small amount of polish, work the pad at a lower speed (approximately 2,000 RPM), and overlap each pass by 50 percent to avoid low spots. The Hex‑Logic design also enhances airflow, which is beneficial during extended polishing sessions. Once the surface appears clear and reflective, wipe away excess polish with a clean microfiber towel.
Step 5 – Apply Wax or Sealant for Long‑Term Protection
The final protective layer locks in the corrected finish and adds a sacrificial barrier against environmental contaminants. Using the FONAROLL Microfiber Wax Applicator Pads, spread a thin coat of wax in a circular motion, then allow it to haze according to the product instructions. The pad’s high absorbency ensures even distribution without excess buildup.
After the haze clears, buff the area with a fresh microfiber towel until a deep, wet‑look shine emerges. For those who prefer a synthetic sealant, the same pad can be used with a comparable product; the microfiber surface will not react adversely with polymer‑based sealants. This step completes the detailing cycle and provides a finish that can endure rain, UV exposure, and road grime.
Tips & Pro Tips
- Always start with the least aggressive pad; moving to a higher cut only if necessary reduces the risk of over‑polishing.
- Maintain a consistent overlap of 50 percent to ensure uniform correction across the panel.
- Keep pads clean between uses; the Chemical Guys Foam Buffing Pad Kit includes a 16 oz cleaner that restores foam elasticity and removes trapped compound.
- Work in a shaded environment to prevent the pad from heating excessively, which can cause clear‑coat burns.
- Store reusable pads flat or hanging to preserve their shape and prevent compression set.
Troubleshooting
Pad overheating: Reduce machine speed, increase airflow, or switch to a less aggressive pad. Overheating often appears as a milky residue on the paint.
Swirl marks reappear after polishing: Verify that the polishing pad is clean; contaminated pads re‑deposit particles. Use the included pad cleaner or replace the pad.
Poor compound pickup: Ensure the pad’s surface is slightly dampened with a few drops of isopropyl alcohol; this enhances compound adhesion without affecting the foam.
Conclusion
This guide has outlined a logical workflow for selecting and using polishing pads with an orbital polisher. By assessing paint condition, matching the appropriate cut level, and following the five detailed steps, one can achieve a professional‑grade finish while protecting the vehicle’s clear coat. The recommended products—FONAROLL Microfiber Wax Applicator Pads, SPTA 6.5" Buffing Pad Kit, Chemical Guys Foam Buffing Pad Kit, Mothers Microfiber Polishing Pads, and SPTA 5.5" Buffing Pad Kit provide reliable performance at reasonable prices.
Apply the knowledge gained here to each detailing session, and the vehicle will retain its showroom brilliance for years to come.
Products Mentioned in This Guide
Frequently Asked Questions
What factors determine the correct polishing pad for my orbital polisher?
Consider the pad’s foam density, cut level (coarse, medium, fine), and the condition of the paint you’re working on.
How do I match pad cut level to paint defects?
Use coarse pads for heavy oxidation or scratches, medium pads for moderate swirl marks, and fine pads for final polishing and gloss.
Can I use the same pad size on different orbital polishers?
Most orbital polishers accept standard pad sizes, but always verify the machine’s pad diameter compatibility before swapping.
What is the risk of using the wrong pad on my vehicle’s finish?
An incorrect pad can cause insufficient correction, introduce new swirl marks, or even damage the clear coat through excessive heat or abrasion.
Do I need a separate pad for compound and wax application?
Yes, use a cutting pad for compound to remove defects, then switch to a soft finishing pad for applying wax or sealant for a smooth, glossy finish.